CLICK HERE FOR FREE BLOGGER TEMPLATES, LINK BUTTONS AND MORE! »
Showing posts with label canvas. Show all posts

Wednesday, February 20, 2013

A Gift for my Daughter, and a Challenge

I have wanted to make this for my daughter for a long time. I finally took the time this week. And I love it. I'm so excited. I think she will be too :)
I should have taken pictures along the way, but I never think about that until I'm done :p
By the way, the canvas is much less green than it looks on my monitor at work ;).
I started out with a 12x12 canvas, a stencil, and some gesso. I never thought it would work out this good! I laid the stencil on the canvas, and spread some gesso over it. When I lifted it I was amazed with how defined the pattern of the stencil was. I got the idea from Angie Blom. She used textured paste. Loved hers, and thought I'd add that to the canvas for my daughter. 
The canvas was painted with a combination of a few Liquitex Soft Body acrylic paints. After that was dry I used Martha Stewart Tintable Antique Effect with a little brown acrylic paint. You use very little paint in the Antique Effect, paint it allover, then wipe it off. I love the effect. It settles in the little nooks and crannies. I also used it over the heart, and on the edges of the patterned paper. 

The heart was torn out of simple printed paper from SU. The wings were cut out of the same paper. I painted the heart red with my fingers. I didn't want it to be perfectly painted. Then I used a toilet paper roll to make some big circles. I added some small dots with Unity's Distressed Dots.

All of the papers, and the lace, were adhered with Mod Podge! Love that stuff!
The words, from the Donna Downey Adore Unity Stamp Set, were stamped with black paint. I wanted it to really show up. 
So, there you have it! 
I'm linking this up in the Unity Challenge. Go see what others have posted. Some great ideas out there!
Thank you for stopping by!

Thursday, May 3, 2012

Growing in Unity, Day 4!

Today I have another canvas!
I really do enjoy making these.
There are a lot of mistakes creative liberties on this. More on that later ;)
 This canvas is deep. That makes it stand up on its own easily. Bonus!
I Mod Podged some book pages on the canvas first. Some of the pages I came across were pretty risque! I thought it best to leave them off since I'm not sure what I'm doing with this yet ;)
I cut and punched a border for this baby. Love pretty papers!
I thought it would be awesome to cover the whole thing with Picket Fence Distress Stain. Looked great, but I wanted a darker, more aged look. Hmmm, what to do, what to do...
Well, I have a re-inker for my Old Paper Distress ink. I'll just smear some of that over the whole piece.
It would have been genius, if the Distress Stain were permanent, which it's not. I knew that, but I went with it.Yikes! That was some icky, sticky muddy looking, oily feeling mess. I know this because I used my fingers to apply the re-inker. I let it sit for a looooooong time. Tick Tock Tick Tock...
 It was beyond icky. This stuff was not drying. So, I wiped it off with a paper towel, and I loved what I was left with! I did go back over it with the Distress Stain a bit. Overnight it dried much more. 
I stamped the Unity Itty Bitty "My Heart Belongs" with Staz-On, and painted the heart with Liquitex ink. Then I stamped the sentiment, cut it out, and distressed it. I doodled around the image and the top and bottom borders, and over the sentiment.
I decided I needed a little more, so out came the Magic Mesh and some paint. Then I lightened the paint and dabbed a little more on with some bubble wrap.  
 After all of the, ahem, new techniques I love the end result! It's messy and imperfect, and me! 

Thanks for making it all the way through my rambling :) I hope it makes sense.
I really appreciate you stopping by. Now make sure you comment for a chance to win! One more day, and tomorrow I'll have a few things to share.
Have an awesome day!

Wednesday, May 2, 2012

Growing in Unity, Day 3

Today I have a canvas for you.
The first thing I did was Mod Podge tissue paper onto the canvas. 
I love the texture it gives to the piece. 
The background color comes from Faber-Castell Gelatos. Awesome stuff!
I used a Prima mask and Studio Calico Mister Huey for the green swirl design.  
 This is where the Unity "Harmony" Stamp Set comes in. I love that set! I'm all about peace, love, and harmony! I stamped the images in black StazOn. I went over the peace sign with a Faber-Castell  Big Brush Pitt Pen, then smeared it with my finger to cover the peace sign. 
Remember the Magic Mesh from back in the day? I have some that I never used, and  I use it on almost every canvas I make. I use it as a stencil and dab paint over it. It makes a great design. This time I used white Model Magic for some texture and dimension. 
I wanted a little more on the canvas, so I stamped the winged heart, but I stamped it with Glimmer Mist! I smeared it on the stamp with my fingers.  
 Thanks for stopping by, and don't forget to come back tomorrow, and comment for a chance to win some Unity Stamps!
Have a great day!

Saturday, February 4, 2012

Love With All Your Heart

I am really excited about finishing this! I started on it months ago! 
I love doing canvases. There's nothing like a paintbrush in my hand to ease my mind.
 You can see the texture on this. The first thing I like to do is put down some tissue paper with Mod Podge. I love the texture. 
The background was done with Faber Castell Gelatos. Scribble the color where you want it with them, then blend with a brush and water. 
The black is stenciled using cardstock I punched this design from. 
 To get the letters, I put down chipboard letters and trace around them. Then I paint and outline them. 
 I love the bright colors! 

Thanks for stopping by! I love having people over ;)
Have an awesome day!

Saturday, August 6, 2011

This is Why I Haven't Been Posting

I have been painting! This has undergone many revisions! I have painted over, painted over, papered over, and painted over. I thought I like the first version, then I hated it. Then I re-did it and loved it, then hated it, then re-did it, and REALLY hated it! Then I painted over the whole thing, except for the bottom. The bottom (sand) has remained the same throughout. That is the only part that has remained! 
Now I LOVE this! I want to get prints made to sell on my Etsy shop :)
 I've learned a lot while working on this. 
First of all, don't be afraid of the paint. Whatever you don't like, you can paint over, and over, and over again if you need to ;) 
Second, there is no such thing as perfection! Just do it, and love it.
I also learned, enjoy the process! Sometimes just putting the brush to the canvas is the best therapy ;)

Thank you for looking in! I appreciate you taking the time to stop by. I also appreciate every single comment more than you know!
Have an awesome day!

Wednesday, July 27, 2011

Just a Little Canvas

Another attack of insomnia, and this was the result :) This midlife stuff is pretty bad for the body, but great for my creative juices. Wait until you see last night's creation!
This is a 6 x 6 canvas from Dick Blick. A nice size for a little middle of the night creativity.
I painted the background all kinds of bright summer colors, then painted over the colors with light blue and white. You can still see shades of the other colors underneath. It makes for some nice texture.
 I stamped the bicycle from Unity with gray ink, then painted over it. I did the same with the flowers and the sun. The sentiment is stamped in Black Staz On. 
 The highlights are done using the Sharpie paint marker.
 I don't have any particular plan for this little canvas. For now it just sits on my table and makes me happy ;) 
 Thanks for stopping by :) 
Have a fantastic day!

Monday, July 18, 2011

Be Nice

I made this canvas for my entryway, for various reasons ;)
I love it! I had seen signs with this saying on it lately, and I knew it was perfect for us :)
 To start with, I Mod Podged a piece of an old pattern on the canvas. I brushed a little cream paint over it, but only enough so you can still see some of the lettering on the pattern. For the next part, I traced the awesome Cosmo Cricket Blackboard "Sweet Mix" chipboard letters (that I may never use because I love them so much!) onto clear Contact paper. I think I'll just trace them forever!
I cut them out by hand (this is where one of those nifty Cricut's would come in handy). Then I lined them up on the canvas and painted it. I used a crumpled up paper to blot some of the paint off. I wanted it to look old. Yes, that was on purpose :)
When the paint was dry I peeled the letters off, and was sooo excited! There was paint that seeped under the letters, so I just touched it up a little. The I outlined it with a black pen, and added a sloppy little shadow for some dimension. Love it!
I may sand it a little yet. I'm not so sure. If I do I will post an updated pic.
Thanks for stopping by! I appreciate it :)
Have a glorious day!

Friday, June 3, 2011

Original Canvas :)

When I get stressed I go to my craft room. Yesterday was one of those days :/ I was in a really bad mood. I don't know how I created something so bright and cheerful while I was in such a yucky mood, but I did :)
I really enjoyed making this. It's an 11x14 canvas so I was a little nervous.
The papers I used are My Mind's Eye - Bloom & Grow and Fine & Dandy, and Cosmo Cricket - Material Girl.  
The background was done using Faber Castell Gelatos over tissue paper for texture. I used various acrylic paints over the papers. Everything was outlined with a Pilot Permaball pen, and highlighted with a Sharpie Poster Paint Pen in white. A little shading on the stems and leaves were done with a Copic marker. I almost forgot, I used the Unity Worn Grid and Distressed Dots Backgrounds for added texture. And of course, Mod Podge over everything :)
Thank you for looking :) I really enjoyed creating this, and couldn't wait to share it with you!
Have an awesome day!!!

Sunday, March 6, 2011

Another Canvas!


I'm loving these canvases! Here is a big departure from the first one, but I think I like the style of the first one. I admit she looks a little like a linebacker, but I still like her.
Thanks for stopping by :)

Thursday, August 19, 2010

The Grand Finale for Growing In Unity!!!

This week has been fantastic! I have tried to give you all and Unity my best work, and I have loved every minute of it! This last project is one of my favorites.
I had this very inexpensive, very plain, canvas tote bags. I decided to attempt to channel my inner Donna Downey for this one. She rocks! I painted the bag with acrylic paint, and painted the edges darker.
I stamped Unity's Worn Grid as a background for the flowers with SU white craft ink, then Purely Entwined, a Unity stamp by Donna Downey, in navy. I also stamped the verse from Donna Downey's Unity set "She" in navy. First I smeared some SU craft white ink in the area I wanted to stamp on.

It was ok, but not quite what I wanted. So on went the Primas! First I sprayed them with white Smooch spray for a little shimmer. If I'm going for it I may as well go all the way eh? I figured I should add some real bling, so I added these gorgeous rhinestones, Lush from My Minds Eye.
I added some pearls also.

The top of the bag looked naked, so I added some plain twill, some leaf ribbon, teeny flowers, and more rhinestones.

The verse wasn't showing up like I wanted it to, so I went over it with a Sakura Stardust pen. That made it worse, so I went over that with a black Sharpie pen. It worked great, and you could still see the shimmer from the Stardust pen.

So here's the final product! I must say I loveth it! I will probably add some more to it over time, and I do have to finish the back. I'll show the progress on that as I finish it.
Thank you for sharing this week with me! I appreciate all of the comments! Don't forget, your names will be put into a drawing for a prize from Unity on Saturday. Check back for that ;)
I kind of forgot, this is for Unity Friends with Flair too! Next up in the hop is Angie Blom's blog. She's pretty awesome! Enjoy!

Wednesday, June 23, 2010

Look What Happens When You Can't Sleep


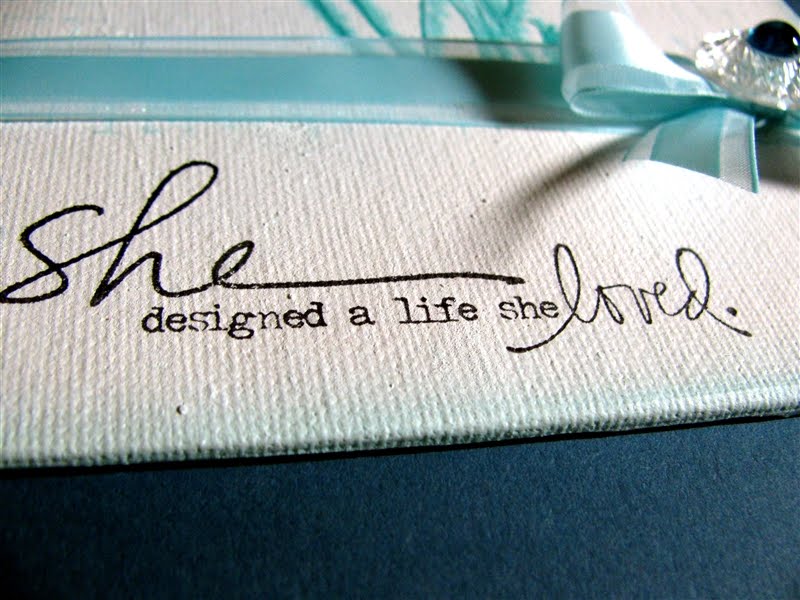
Awake at 2 AM, can't sleep. I tried. So this is what I did. Inspired by the inspiration card here. I used Donna Downey stamps by Unity. Love them! First I masked the middle to stamp the Worn Grid Background just around the edges. The I masked the outside to stamp the flower image. I sprayed the whole thing with Glimmer Mist. You can see a little glimmer in the close ups. It's hard to capture the effect with a camera, for me anyway. I love the way the ink bled! After it dried I used my Stamp a ma jig to stamp the image again over the now blurry flowers. I love the effect! I wish I could say I planned it all, but I just went with it. That happens more at 2 AM I think.

The ribbon was another brilliant 2 AM idea. I didn't have any ribbon to go with the colors, so I made my own. It is white ribbon, but I sprayed it with Glimmer Mist. After it dried it was too light blue, so I sponged it with SU Cool Caribbean ink. Perfect! I've never done that before and didn't know how it would turn out, especially with this ribbon. I didn't know if it would take the color, but it did.

The awesome button is Webster's Pages Vintage Buttons Sparklers. I put the little stone in the center.

I have to get a great frame for this now. Have a great day!

Monday, May 3, 2010

I'M BAAAAACCCCKKKKKK!!!!!!!!!!

I AM back and I'm so happy I am! I have a craft room of my very own (pictures very soon) and a burning desire to create! Last night I created my first project and started another.
I was VERY influenced by Donna Downey. She is phenominal! I love the idea of just putting the brush to canvas (even if I don't know what I'm doing ;). I used watercolor crayons and lots of water. My watercolor crayons are not the quality of hers, but they did well. The flower is from Prima, and the leaf ribbon is from Papertrey Ink. The stamps are from UNITY. It's great to be back! I have a card to post a little later.